The following steps show a full online transaction from start to finish with a credit card payment. In some cases, Trustap also support some local payment methods. For example, Swish, BLIK, iDEAL, Apple Pay, and Google Pay.
Before you begin this guide, follow our setup guide.
Follow our users guide to create user IDs for both seller and buyer.
Before creating a transaction, retrieve the charge for the transaction. This returns the cost for using the Trustap service for this transaction.
price is an integer, in which the last 2 digits are the decimal part of the price. For example, price:1050 currency:eur = 10,50€.
curl --location 'https://dev.stage.trustap.com/api/v1/charge?price=20000¤cy=gbp' \
--user '<API_KEY>:'In the Trustap API, the transaction object includes details about the the buyer and seller, the type of transaction, and the status of the transaction.
curl --location 'https://dev.stage.trustap.com/api/v1/me/transactions/create_with_guest_user' \
--header 'Trustap-User: 1-886e3c26-b585-4c92-a93b-e3c84b9b32e9' \
--header 'Content-Type: application/json' \
--user '<API_KEY>:' \
--data '{
    "seller_id": "1-886e3c26-b585-4c92-a93b-e3c84b9b32e9",
    "buyer_id": "1-615a70d4-b624-4243-95be-a8367b7953ea",
    "creator_role": "seller",
    "currency": "gbp",
    "description": "Ireland vs Croatia UEFA Nations League",
    "price": 20000,
    "charge": 760,
    "charge_calculator_version": 5,
    "image_url": "https://docs.trustap.com/images/soccer-tickets.png"
}'After a transaction is created, redirected the buyer to the payment page to pay for it. Trustap support two methods for payment. These funds will not be released to the seller until the buyer approves.
With card transfer, direct the buyer using a URL to a payment screen where the buyer can enter their card details for secure payment.
During testing, it's helpful to simulate the full payment flow. We recommend using test credit card numbers to complete transactions without processing real payments.
The payment URL that you send to the buyer depends on your type of integration.
In the following examples, replace <CALLBACK_PAYMENT> with the redirect URI you set during your Trustap setup. This is the location where the buyer will be redirected to following payment.
| Use case | URL |
|---|---|
| Test environment - Guest buyer | https://actions.stage.trustap.com/online/transactions/{transaction_id}/guest_pay?redirect_uri=<CALLBACK_PAYMENT> |
| Test environment - Full user buyer | https://actions.stage.trustap.com/online/transactions/{transaction_id}/pay?redirect_uri=<CALLBACK_PAYMENT> |
| Production environment - Guest buyer | https://actions.trustap.com/online/transactions/{transaction_id}/guest_pay?<CALLBACK_PAYMENT> |
| Production environment - Full user buyer | https://actions.trustap.com/online/transactions/{transaction_id}/pay?<CALLBACK_PAYMENT> |
For example:
https://actions.stage.trustap.com/online/transactions/25273/guest_pay?redirect_uri=https://www.example.comThe Trustap API also supports state when sending a buyer to the payment screen.
Learn more about state in our guide.
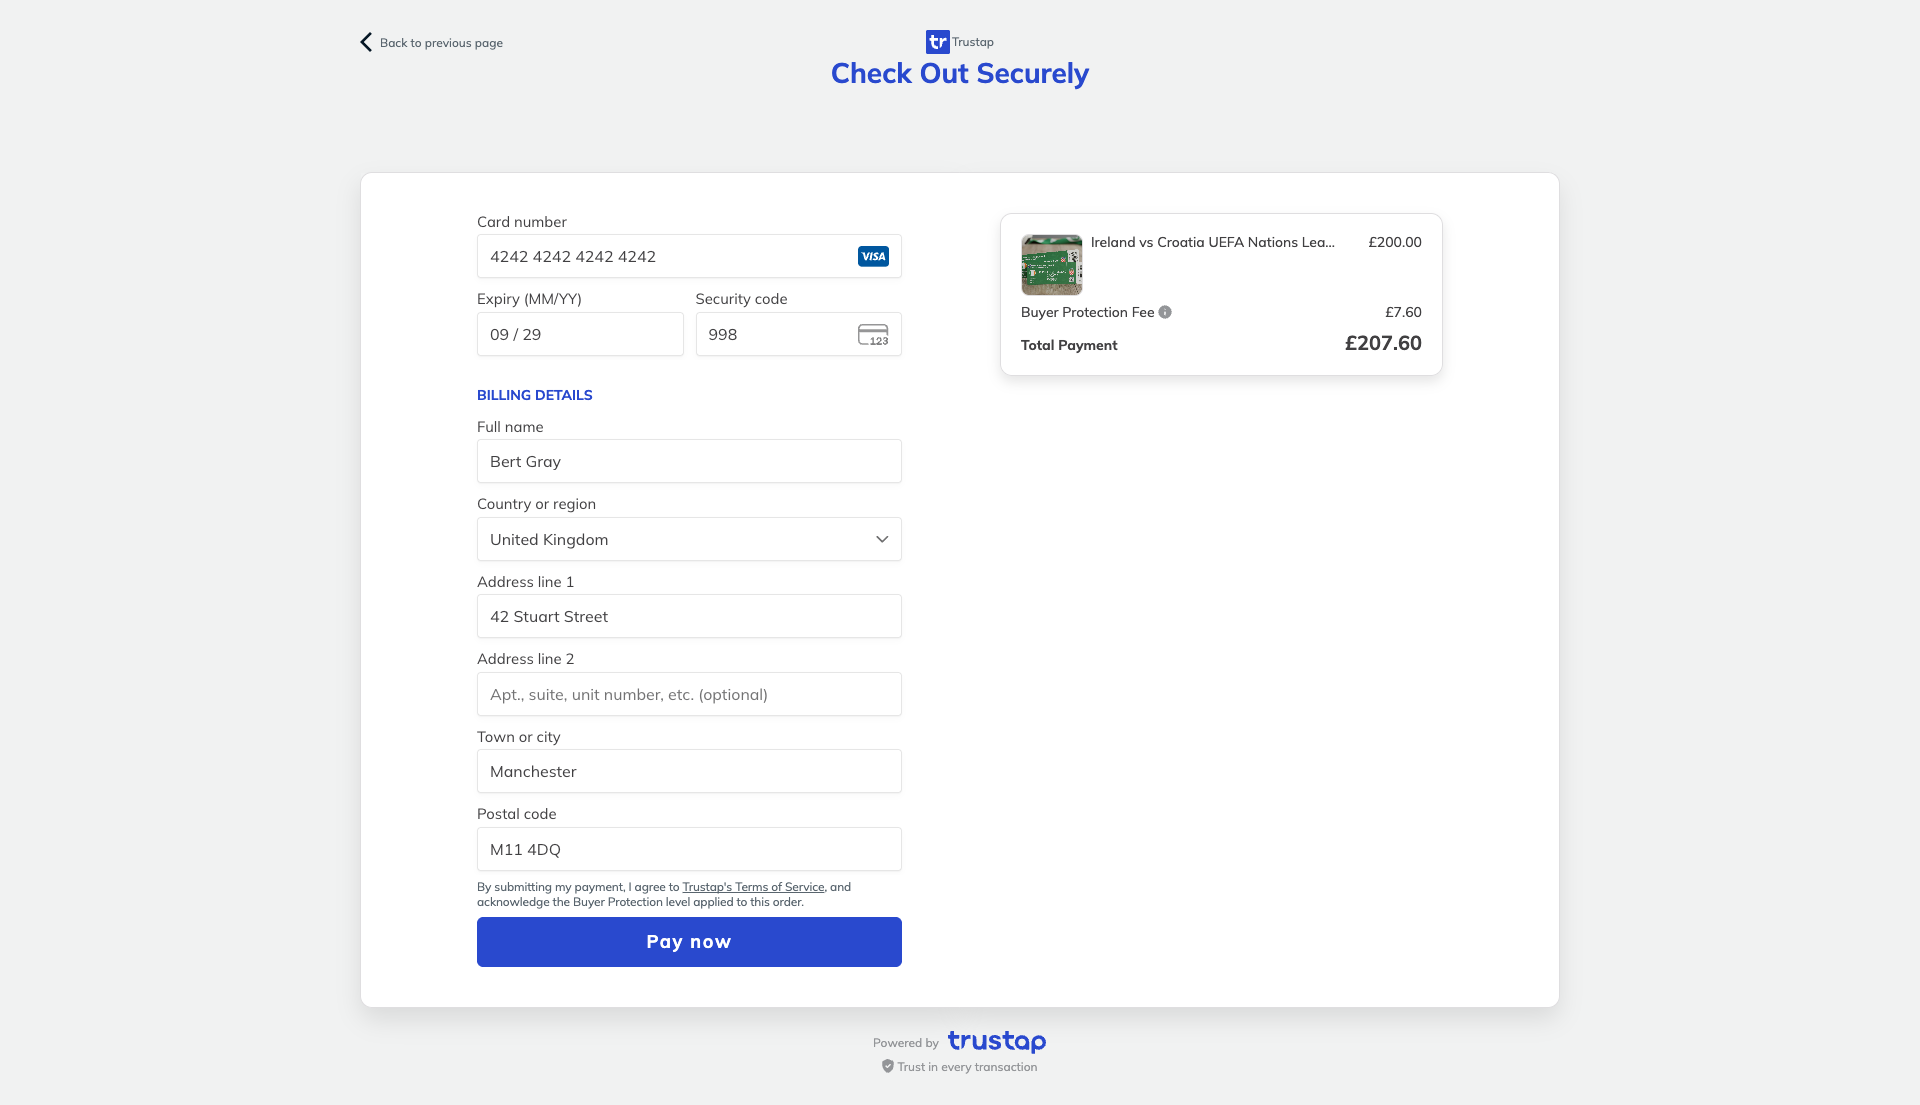
The payment screen looks like the following.

When the seller has arranged delivery, they add the tracking details to the transaction.
The Trustap API also supports an integrated shipping solution. See our Shipping guide for more information.
curl --location 'https://dev.stage.trustap.com/api/v1/transactions/25273/track_with_guest_seller' \
--header 'Trustap-User: 1-886e3c26-b585-4c92-a93b-e3c84b9b32e9' \
--header 'Content-Type: application/json' \
--user '<API_KEY>:' \
--data '{
"carrier": "ups",
"tracking_code": "345345123"
}'Once the item has been delivered, the buyer must confirm the delivery was complete before funds can be released to the seller.
The complaints period begins (24h) when any of the users confirms the delivery.
curl --location --request POST 'https://dev.stage.trustap.com/api/v1/transactions/25273/confirm_delivery_with_guest_buyer' \
--header 'Trustap-User: 1-886e3c26-b585-4c92-a93b-e3c84b9b32e9' \
--user '<API_KEY>:'At this point, the buyer has an option to create a complaint. This means that were not satisfied with the transaction. A complaint will pause any payout until the dispute has been resolved.
See our guide to create a complaint.
- A seller must register for a full Trustap account before they can claim a transaction. See our full user guide for details.
- Using the seller full Trustap account user ID as
Trustap-User, claim the transaction. This links the transaction to their full Trustap account.
curl --location --request POST 'https://dev.stage.trustap.com/api/v1/transactions/25273/claim_for_seller' \
--header 'Trustap-User: b9c9e108-1edd-5d5e-8268-8873d7beb3e3' \
--user '<API_KEY>:'- Following confirmation of delivery and a successful complaints period, the seller will receive the payout from the transaction to their account.